easy + inexpensive valentine’s day cards

Valentine’s Day is right around the corner — more specifically, next week! How does the time fly by so quickly?

I have always loved Valentine’s Day because I love an excuse to make a big deal about my friends and family. I love to show them that I care. Quite simply, I LOVE love! šŸ™‚ And Valentine’s Day is the perfect reminder to appreciate those special people in your life and let them know how much they mean to you.

Over the next week, I’ll be doing a series of “Countdown to Valentine’s Day” posts with lots of ideas on how your can make your Valentine’s Day a masterpiece–whether you’re single, dating, engaged, married, or somewhere in between!

valentines week

When I was browsing the Valentine’s Day section at the grocery store a couple days ago, I looked through the adorable sets of cards available for kids to bring to their classmates and friends. I remember as a kid picking out cards with my favorite Disney princesses {I was a Belle girl all the way!} or Power Rangers {anyone else like the Yellow Ranger the best?} or, one year, Blue’s Clues. {I might have had a little crush on Steve.}

But gone are the days of simple paper fold-over cards. I had a great time surveying the shiny foil cards, the stickers, the sequins … but the price tags, whew! Those Valentines can get a little pricey, especially when you factor in candy and multiple children to buy card sets for!

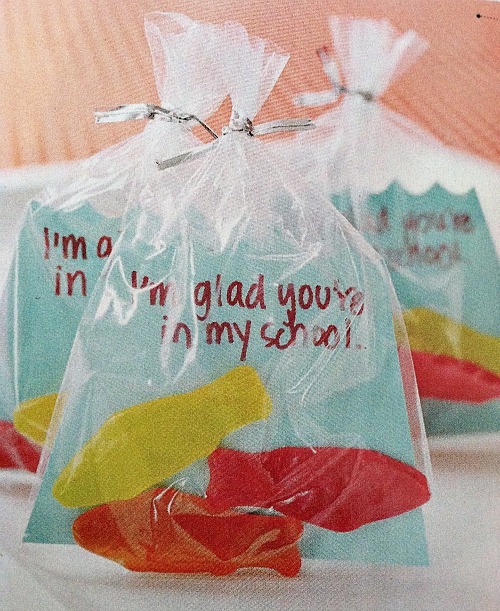
That very same day, my blogging buddy Andrea over at Simple Organized Living ran a post called Two SO-Simple DIY Valentine’s Day Cards. I especially loved her idea about using Swedish fish {one of our Jude‘s fave candies} and a handmade card that reads, “I’m glad you’re in my school.” Seriously, how cute are these?

Another idea:

  • Purchase a pack of stickers featuring your child’s favorite cartoon or action figure. {You can find a great selection for a couple bucks at Toys R Us, Target, and most pharmacies or grocery stores in the card aisle.}
  • Pick up a pack of blank index cards.
  • Write out different Valentine’s messages onto the cards with bright markers.
  • Let your child decorate the cards with stickers.

This not only saves you money on cards, it also becomes a fun craft activity for your child. What better way to encourage empathy and compassion for others than writing kind words on Valentines?

You could also do a twist on cards by making them edible:

  • Bake a batch of cookies or cupcakes.
  • Frost them.
  • Before the icing hardens, press down one or two candy “Sweethearts” into the icing.
  • Your child gets to choose who gets what Sweetheart message.

cupcakes with candy hearts

What are some of your favorite Valentine’s Day memories? Do you have any inexpensive, handmade card ideas?

Till soon!
-Dallas

homemade festive christmas chain

Good morning! Hope your transition from the long holiday weekend back into your regular routine wasn’t too painful yesterday. I had a nice time seeing my students again and hearing about their Thanksgiving breaks. I can’t believe we only have two more weeks left of the semester!

Christmas is in full swing here in my little apartment. Today I’m excited to share an easy, super inexpensive, and wonderfully festive holiday craft with you.

Remember those colorful paper chains you used to make in elementary school to decorate the classroom or count down to holidays or special events? In my family we used to make them as count-downs until Christmas or our birthdays and tear off one strip each day … it was so exciting to watch the chain gradually get smaller and smaller as the big day approached!

We also used to make chains with red and green construction paper to decorate our stair bannisters. The only problem with using paper is it isn’t very durable. We would make them again and again year after year, which was fun in its own way {especially as kids} but it isn’t very environmentally friendly or time-friendly — there are so many other craft and decorating projects I want to try rather than doing the same one year after year!

After some brainstorming, I came up with an idea: what about using using green and red felt instead of construction paper?

TA-DA! A homemade festive Christmas chain that will last from year to year. The best part? It costs less than $3.00 to make!

Here are the supplies you’ll need:

  • scissors
  • stapler & staples
  • red & green felt — I used 5 sheets of each color {got them at Michael’s for $0.29 each}

Directions:

1. Cut the felt into strips about 1 inch wide.

2. Bring one strip of felt together into a loop and staple the ends to each other.

3. Take a strip of the alternate color and loop it through, stapling its ends together to make another loop.

4. Continue the process until your chain reaches your desired length.

Then display them around your house! These are great hung around the walls and draped over a mantel. I don’t have a mantel in my apartment, so I draped mine over the top of my bookcase where my stockings are hanging.

And that’s it! Hope you enjoy this festive Christmas craft.

Have a great day!
-Dallas

turkey enchiladas

Sorry I’ve been MIA the past week … I strained my hand from overuse of the computer, so I had to take some time completely computer-free. (It’s crazy how much I use the computer in my daily life — writing, blogging, checking email — I didn’t know what to do with myself without it!)

My hands are feeling better, and today I have another delicious & healthy recipe to share with you, courtesy of my amazing mom!

Ingredients:

  • 1 package ground turkey meat
  • 1 yellow onion
  • 1 package of whole wheat tortillas
  • 1 can enchilada sauce (I like the La Victoria brand, mild)
  • a few handfuls of shredded cheese

1. Brown the ground turkey in a pan on medium heat. While the turkey is cooking, dice the onion.

2. Drain the fat from the turkey. Add the onion and cook for 2-3 minutes more.

3. Open can of enchilada sauce and pour about 1/3 of the can into a glass baking dish (I used a 10 x 13 size) so it covers the bottom.

4. Hold one tortilla in your hand. Scoop in some of the ground turkey mixture, a spoonful of enchilada sauce, and a bit of shredded cheese. Roll the tortilla closed and place in the baking dish. Repeat until all the ground turkey is gone. (I usually make 5-6 enchiladas.)

5. Pour the remaining enchilada sauce over the enchiladas and spread with a spoon until all parts of the tortilla are covered. Sprinkle with cheese.

6. Bake for 15-20 minutes in an oven set to 350 degrees.

And there you go! I served mine with green beans and a fresh garden salad. This recipe served my whole family with two extra enchiladas left over for lunch the next day! Yummy, healthy, easy and inexpensive — what more can you ask for in a meal?

Happy eating!
-Dallas

—————————————-

Cost: $15.00
Time: 30-40 minutes (including bake time)