peanut butter coconut flour protein muffins

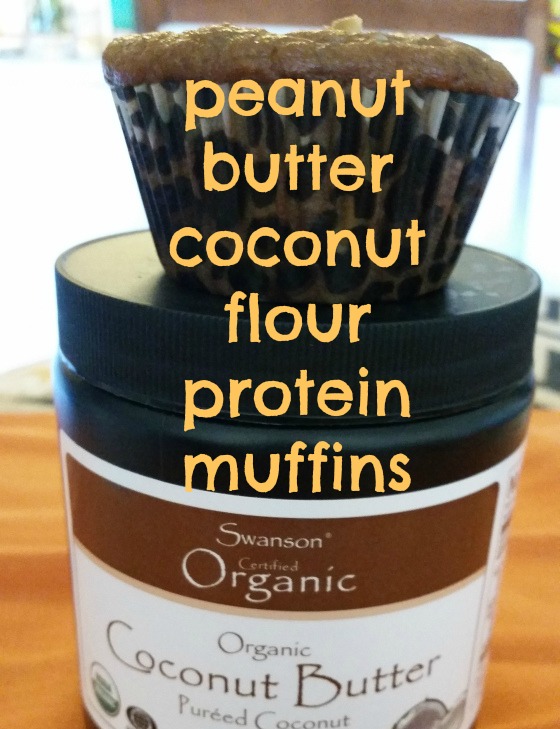
Hi everyone! I have another recipe to share with you today, starring another cool flour: coconut flour! One reason I love baking with coconut flour is that it is packed full of fiber: a single serving of 2 tablespoons delivers a whopping 5 grams of fiber! It is also gluten-free, low in carbs, and high in protein. Coconut flour is made by grinding dried, defatted coconut meat.

These muffins are light and airy, while also being filling enough to keep you satisfied all morning. You can easily adapt these by mixing in your own favorite goodies — I think they would be great with nuts or dried cranberries stirred in, or maybe even chocolate chips! I love to amp up their peanut butter flavor even more by topping them with additional peanut butter! {As my brother would say, “Out of control…”} 🙂

I hope you enjoy these as much as Allyn and I did!

coconut-muffins-edited

{recipe adapted from Eat Good 4 Life}

Makes: 12 muffins

    • 1/2 cup natural peanut butter
    • 1/2 cup coconut butter
    • 2 organic eggs
    • 1 tbsp ground flax
    • 3 tbsp water
    • 1 banana, mashed {about 1/2 cup}
    • 1/2 cup nonfat greek yogurt
    • 1/4 cup + 2 tbsp coconut flour
    • 1/4 cup coconut sugar
    • 1/4 cup milk, almond milk, soy milk or rice milk
    • 1 tsp baking soda
    • 1 tsp cinnamon
    • 1 tsp vanilla extract

1. Preheat oven to 350 degrees F. Line a muffin baking pan with paper liners and set aside.

2. In a small bowl, mix the water and ground flax and set aside.

3. In a medium bowl, stir the coconut flour, coconut sugar, baking soda, and cinnamon.

4. In a large bowl, mix the bananas, eggs, vanilla extract, coconut butter and peanut butter. Using a wire whisk or electric mixer works very well! Next, slowly add in the flaxseed-water mixture, yogurt and milk.

5. Add the dry ingredients to the wet ingredients and gently combine.

6. Scoop batter into your muffin pan, filling each muffin cup 3/4 cup of the way.

7. Bake for 20-25 minutes. Remove from the baking pan and cool muffins on a wire rack.

8. Store in an air-tight container. These muffins also freeze well!

20161019_123152

if you enjoyed this recipe, you might also like:

banana buckwheat autumn muffins

Happy Monday, everyone! It has been a rainy weekend here, which is wonderful because 1) we need all the rain we can get here in California! and 2) it actually feels like autumn! I love everything about autumn. The chill in the air, the scarves and boots, the fall leaves, pumpkin spice everything… it always makes me feel the best combination of cozy and energized!

These muffins are the perfect excuse to do some healthy autumn baking. They’re bursting with the flavors of the season — apple, dried cranberries, pumpkin pie spices — and are also way good for you, packed with protein and naturally sweetened with honey and coconut sugar.

I have been exploring different types of flours in my baking recently and was excited to try out buckwheat after reading about its health benefits: it is an excellent source of nutrients and fiber, is great for your cardiovascular system and helps control blood sugar. Buckwheat is actually not a cereal grain, but a fruit seed related to rhubarb and sorrel, so it is often used as a substitute for those with gluten allergies or who are sensitive to wheat. The seed is ground into a flour that is dark in color and has a strong, nutty flavor.

These muffins get sweetened up by the fruit, but they are definitely not cupcake-sweet. I love to eat them smeared with peanut butter or pumpkin butter for an extra kick of flavor! Hope you enjoy them as much as we do around here!

buckwheat-muffins

{recipe adapted from Martha Stewart’s sugar-free muffins}

1/2 cup buckwheat flour
1 tsp baking powder
1 tsp baking soda
1 tsp ground cinnamon
1/2 tsp pumpkin pie spice
1/4 cup coconut sugar {or substitute sugar of your choice}
1 tbsp ground flaxseed
3 tbsp water
3 eggs
1 ripe banana, mashed
1/4 cup honey
1 tsp vanilla
1 apple, finely diced
1/2 cup chopped walnuts
1/4 cup dried cranberries

1. Heat oven to 350 degrees. Line a 12-cup muffin pan with paper liners.

2. In a small bowl, combine the ground flaxseed and water; mix together and set aside.

3. In a large bowl, mix the buckwheat flour, baking powder, baking soda, cinnamon, pumpkin pie spice, and coconut sugar.

4. In another bowl, whisk together the eggs, banana, vanilla and honey. Add the ground flaxseed-water mixture.

5. Mix the wet ingredients into the dry, then fold in apple, dried cranberries and walnuts.

6. Pour batter to the tops of lined cups. Batter will be very runny, but that is normal!

7. Bake for 30 minutes, until the muffins turn a deep chocolate brown and a toothpick comes out clean.

buckwheat muffins 2

carrot cake coconut muffins w/chickpea flour

A couple nights ago I posted a photo on Instagram of some evening baking, and multiple people commented asking for the recipe! So of course I had to share it on here. 🙂

This recipe marks my first time ever baking with chickpea flour! I was inspired by Robyn @the real-life rd to order some, because it is packed with veggie protein, iron and fiber, and she swore it is easy to sub into baking recipes. I have to say I was quite impressed with its soft texture and the hint of sweetness it brings to these muffins. To make these gluten-free, I also used rice flour, although you could use whole wheat flour if you would like.

These muffins are moist, soft, and packed with autumn flavors. They have no sugar, just maple syrup. I love them warmed up for breakfast, smeared with peanut butter, and also for dessert! You could even slap some frosting on these bad boys and call them cupcakes.

Hope you enjoy them as much as we did around here! And I will definitely be sharing more recipes with chickpea flour in the future — I’m hooked. 🙂

carrot cake muffins chickpea flour

carrot cake coconut muffins w/chickpea flour

{adapted from this recipe at Wallflower Girl}

– 1/2 cup rice flour {or whole wheat flour}
– 1/2 cup rolled oats
– 3/4 cup chickpea flour
– 1/2 tsp baking powder
– 1/2 tsp baking soda
– 2 tsp cinnamon
– 1 tsp pumpkin pie spice
– 1/2 cup vegetable oil or coconut oil
– 1 cup water
– 3/4 cup maple syrup
– 1/2 cup grated carrot {I used one large carrot}
– 1 cup shredded coconut
– 3/4 cup raisins
– 1/2 cup chopped walnuts

1. Preheat oven to 350 degrees. Line muffin tins with liners or spray lightly with nonstick spray.

2. In a large bowl, stir together dry ingredients: rice flour, rolled oats, chickpea flour, baking powder, baking soda, cinnamon, and pumpkin pie spice.

3. In a separate bowl, combine wet ingredients: vegetable oil/coconut oil, water, maple syrup, grated carrot, and shredded coconut.

4. Pour wet ingredients into dry ingredients and stir until combined. Batter will seem a little thin, but that is okay!

5. Add raisins and chopped walnuts.

6. Fill your muffin tins pretty much to the top. Bake 20-25 minutes, until a toothpick inserted in the center of a muffin comes out clean.

carrot cake muffins

Have you ever baked with chickpea flour? If so, please share your favorite recipes in the comments section!

if you enjoyed this recipe, you might also like:
coconut zucchini muffins
apple banana oatmeal muffins
gluten free apple pie bites

homemade yummy hummus = yummus!

Considering my love for hummus now, it’s hard to believe, but I did not discover this delicious dip until I was in college. I particularly remember falling head-over-heels for hummus my junior year, when I studied abroad for a semester in Norwich, England. The grocery chain Tesco made a superb fresh hummus, and nearly every weekday for lunch I would make myself a plate of hummus and pita bread before heading off to class. My flatmates {dormmates} would tease me about it, and I kept wondering when I would grow tired of my hummus lunchtime routine, but I never did. I ate hummus and pita bread for lunch nearly every weekday of my sixth-month stay in Norwich, and I kept eating it when I returned home to the States. I’ve never been able to find a store-bought hummus that tastes quite as good as my memory of that hummus from Tesco. Plus, store-bought hummus can get a little pricey, and who knows what preservatives and additives I’m inhaling along with my pita bread.

So, this week, I decided to get out my blender and try making my own hummus. I’m SO glad I did, because it is absolutely delicious, waaaaay cheaper than store-bought brands, and could not be easier to make! I also love how I can control how much oil, garlic and spices go in. And it was simple to make my hummus organic — I just paid 20 cents more for the organic version of Kroger-brand garbanzo beans!

easy-peasy garlic hummus

– 1 (19 ounce) can garbanzo beans, most of the liquid reserved
– 1 tablespoon lemon juice
– 1 tablespoon olive oil
– 2 tablespoons tahini
– 2 cloves garlic, chopped {I used 2 tsp pre-chopped garlic}
– 1/4 teaspoon salt
– black pepper, red pepper, or cumin to taste

1. In a blender, or by hand, chop the garlic. Pour garlic and garbanzo beans into blender.

2. Pour lemon juice, tahini, olive oil, chopped garlic, salt, and optional spices in blender. Blend until creamy and well mixed.

3. Add additional bean liquid to get desired texture and additional spices, salt and lemon to taste.

4. Optional: chill in the fridge for 15-20 minutes, or as long as you can stand the wait. I think this hummus tastes even better the next day, once the flavors have had a chance to marinate together for a little while!

I served mine with fresh sliced carrots and cucumber. I also love eating hummus with warm pita bread. Makes a great lunch or healthy snack! Hummus also makes a great sandwich spread — I’ll use it instead of mustard or mayonnaise.

What are some of your favorite veggie dips & sandwich spreads? Any other hummus-obsessed people out there?

-Dallas

———————————

-Time spent: 15 minutes
-Cost: $3.00

You might also enjoy these healthy snack posts:
baked mango with brown sugar & cinnamon
creamy avocado yogurt dip from Two Peas & Their Pod
honey goat cheese dip from Peanut Butter Fingers