peanut butter cup brownies

Thanks to everyone who joined in Monday for this week’s #yearofkindness challenge {delivering valentines to a nursing home} and those who were with us last week for my fave romantic movies and easy, inexpensive homemade Valentines ideas. Today we’re continuing “Valentine’s Week” with a delicious recipe that you can make for your sweetie, friends, coworkers, or even yourself!

valentines week

Peanut butter and chocolate may be my all-time favorite dessert combo, so it’s no surprise I was inspired to combine peanut butter cups and dark chocolate brownie mix! I thought I was soooo clever for using my muffin tin to make these cute little brownie cups, but one of my friends told me she and her mom have been making these babies for years. Maybe I’m a little late to the party, or maybe it’s just true that great minds think alike! 🙂 Either way, these are de-li-cious and so easy to whip up. Enjoy!

peanut butter cup brownies

– 1 package brownie mix {i like the dark chocolate variety}
– 1 package mini peanut butter cups
– 1 egg
– 1/3 cup vegetable oil
– 1/3 cup water

1. Preheat oven to 350 degrees. Line muffin pan with paper cups or spray with vegetable spray and set aside.

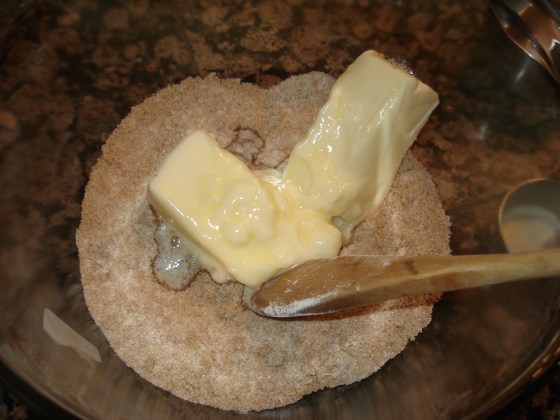
2. In a medium-sized bowl, combine brownie mix, egg, vegetable oil, and water. Stir until ingredients are well-mixed and there are no lumps in the batter.

3. Fill each muffin cup 3/4 of the way to the top with the batter.

4. In the center of each cup, gently press an unwrapped peanut butter cup.

reeses brownies

5. Bake for 20-22 minutes, until a fork inserted in the center comes out clean.

reeses brownies

YUM! These are dangerously good. You’ll want to eat the whole batch yourself!

What are some of your favorite Valentine’s Day memories? Are you planning to do any Valentine’s baking this year?

More tomorrow!
-Dallas ❤

————————-

Looking for more Valentine’s Day treats to make? You might enjoy these earlier posts:
red velvet cupcakes with coconut cream-cheese frosting
rice krispies treats with m&ms
chocolate strawberry coconut cookies

mom’s classic chocolate-chip cookies

My mom makes AMAZING chocolate-chip cookies! Back in college she’d send me big batches of chocolate-chip cookies and my dorm-mates would actually cheer. {I would share them of course!} Hmmm, thinking about it now, maybe I should thank Mom for helping me make friends! 🙂

This year, Mom gave me her recipe and I tried my hand at making a batch … they didn’t turn out quite as well as hers, but still pretty darn delicious. Crispy, buttery edges; gooey chocolatey middles. It’s hard to go wrong with a chocolate-chip cookie!

chocolate chip cookies

mom’s classic chocolate-chip cookies

– 2 and 1/4 cups flour
– 1 tsp baking soda
– 1 tsp baking powder
– 1 tsp salt
– 1 tsp cinnamon
– 1 cup butter, softened
– 3/4 cup sugar
– 3/4 cup packed brown sugar
– 1 tsp vanilla extract
– 2 large eggs
– 1 package semi-sweet chocolate chips

1. Preheat oven to 375 degrees and line a baking sheet with parchment paper.

2. Cream butter through sugar.

butter & sugar

3. Add eggs and vanilla and beat well.

4. Sift together flour, baking soda, baking powder, and salt.

flour mixture

5. A little at a time, add flour mixture to wet ingredients, stirring well to combine thoroughly.

cookie batter

6. Add chocolate chips and cinnamon, if desired.

chocolate chip batter

7. Scoop by tablespoons onto a baking sheet.

cookies prebake

8. Bake for 12-15 minutes, until cookies are golden-brown and firm to the touch.

cookies baked

9. Allow to cool for 5 minutes, then remove from baking sheet.

I like these cookies best when they’re still warm — and of course with a big tall glass of milk!

choc chip cookies

Hope you are enjoying these last couple days before Christmas!

-Dallas

———

If you enjoyed this post, you might also like:

butterscotch pudding cookies
aunt elaine’s peanut butter blossoms
apple, brown sugar & cinnamon cookies
pumpkin oatmeal cookies

This post is linked up to Menu-Plan Monday!

MPM-Winter

cake or cake-pops?

Happy Friday, everyone! Hope your day is going wonderfully.

I have a quick question that I’d love your feedback on. I’m hosting a party in a couple weeks and I am trying to decide whether to serve cake or cake-pops.

I like cake because it’s traditional, substantial, and satisfying {seriously, who doesn’t love being served a big slice of cake?}

birthday-cake_21134700

But I’m torn because cake-pops seem so cute and fun and party-friendly. Plus, you can serve a variety of flavors.

chocolate-raspberry-cake-pops-gluten-free-recipe

What do you think?

butterscotch pudding cookies

I am usually a triple-chocolate cookie kind of girl, but I found myself in a butterscotch cookie mood last night after seeing this recipe on the fabulous food blog Two Peas & Their Pod. What makes these cookies unique is the secret ingredient: pudding! This gives them a lovely moistness and keeps them fresh-tasting for days. {If they manage to last that long!}

This is a quick and easy cookie recipe that makes a few dozen cookies — perfect to take to a Thanksgiving gathering as a sweet alternative to classic chocolate-chip cookies. Or make a batch and send some to a friend, as I did. The pudding helps the cookies stay moist, which makes them a good choice to send through the mail.

butterscotch pudding cookies

(recipe adapted from Two Peas & Their Pod)

– 1 cup unsalted butter, at room temperature
– 3/4 cup brown sugar
– 2 snack-size cups of butterscotch cookies
– 2 large eggs
– 2 tsp vanilla extract
– 1 & 1/2 cups whole wheat flour
– 1 cup white all-purpose flour
– 1 tsp baking soda
– 1/2 tsp salt
– 1 tsp cinnamon
– 1 cup butterscotch chips
– 1 cup semi-sweet chocolate chips {if desired}

1. Preheat oven to 350 degrees. Line a baking sheet with parchment paper and set aside.

2. Using a mixer or a whisk, beat together butter and sugars until creamy. Add in butterscotch pudding, eggs, and vanilla extract.

3. In a medium bowl, stir together the flour, baking soda, and salt. Add the dry ingredients to the wet ingredients and mix until just combined.

4. Stir in the butterscotch chips and chocolate chips.

5. Drop cookie dough by rounded tablespoons onto prepared baking sheet.

6. Bake for 10 minutes, or until slightly golden around the edges and set. Remove cookies from oven and let cool on baking sheet for two minutes. Transfer to a cooling rack and cool completely.

How are your Thanksgiving plans coming along? I hope you are having a wonderful week!

❤ Dallas

———————————-

– Time spent: 40 minutes
– Cost: about $5.00

perfect pumpkin pie

Happy weekend, everyone! Sorry that I didn’t get a pumpkin recipe up yesterday … with Greg coming into town and my GRE test this morning, it kind of slipped by the wayside. But I’m happy to report that Pumpkin Week is back today!

I shared in a post last month that I made a delicious pumpkin pie … and that I also made a disaster of a pumpkin pie! Seriously, it was pretty gross. It never seemed fully cooked, so I kept putting it back in the oven for longer and longer, and then the top started to kind of peel away from the rest of the {still-uncooked-seeming} pumpkin mixture. Imagine a creme brulee or pudding sort of thing happening, only on pumpkin pie.

Not. Good.

I was so disheartened I didn’t even take pictures of it. The bad embarrassed blogger in me just tossed it into the trash. I wish now I would have taken pictures so I could have shown it to you. {Thanks to Bonnie at Recipes Happen for encouraging all of us to embrace our mistakes, laugh about them, and learn from them!} Alas, I did not take pictures, so you’ll just have to imagine it and take my word that it was baaaaad.

Here’s what I think happened: I tried substituting truvia for the sugar, and something about that mixture didn’t work out. I don’t know if I added too much of it, or too little, or if just my pie happened to be unlucky, or what. Have any of you tried baking with a sugar substitute like truvia or splenda? Any tips or advice? As you know, I’m always trying to find ways to make recipes healthier! But maybe sometimes, like in the case of pumpkin pie, it’s best to stick with the basics. 😉

I’ve also tried making pumpkin pie with both evaporated milk and sweetened condensed milk, and I must say that I like the sweetened condensed version better. It’s a little creamier texture-wise, and has a good balance of sweetness and pumpkiny goodness. My latest experiment has been trying reduced fat sweetened condensed milk, which I’m happy to report tasted just as delicious with fewer calories! Hooray for small victories.

In the past I’ve always used pre-made graham cracker crust from the grocery store  but in the future I’m hoping to try making my own graham cracker crust {or even my own graham crackers after being inspired by this post by Jill at Reini Days!} I’ll keep you posted! I also am very generous with spices, particularly cinnamon. If you’re not the biggest cinnamon fan, you might adjust the spices to fit your tastes.

perfect pumpkin pie

– 1 graham cracker crust {I like the reduced fat version just fine}
– 1 can pumpkin
– 1 can reduced fat sweetened condensed milk
– 2 eggs
– 1 tsp vanilla
– 2 tsp cinnamon
– 1/2 tsp nutmeg
– 1/2 tsp cloves
– 1/2 tsp ginger
– 1/2 tsp salt

1. Preheat oven to 425 degrees.

2. Combine pumpkin with spices and vanilla.

3. Beat eggs and add to pumpkin mixture.

4. Add sweetened condensed milk and beat well.

5. Pour pie filling into graham cracker crust.

6. Bake for 15 minutes at 425 degrees, then turn oven down to 350 degrees and bake for another 40-45 minutes, until a knife inserted in the center of the pie comes out clean.

Serve with whipped cream on top for the perfect pie experience!

YUM! I love pumpkin pie.

I’m in the mood for celebrating now that my GRE exam is over … hooray for the weekend! 🙂 Hope you are having a wonderful day!

-Dallas

marvelous monday & happy october! baked cinnamon-sugar donut holes

There has been a briskness in the air lately that feels just. so. autumn! It’s lovely. It makes me want to curl up under a cozy blanket with a cup of tea and a good book. {If you’re looking for a good book, I’ve been devouring Elizabeth Berg’s novels lately … I fell in love with her novels Durable Goods and Joy School back in high school, and she is an author I can always return to and feel like, YES, she gets it — this is why I want to be a writer, this is what I want my books to do for people! I nearly always have at least one good, full-hearted cry while reading her books, and I always feel sad to finish them because I don’t want to leave her characters. I’m reading Open House right now and it is wonderful!}

But, yes, back to autumn … I was thrilled when Maria at Two Peas & Their Pod put together this fantastic list of 50 pumpkin recipes! I found myself checking off every one: yes, I want to make that; ooh, that looks delicious; yes, that one, too! Like a kid in a toy store a week before Christmas: I want them all! 🙂

One of the recipes that immediately caught my attention was baked donut-holes. I’m always looking for a way to health-i-fy things. Hmmm, homemade baked donut holes? Why not give it a whirl?

I am SO glad I did! They are pretty much mini-muffins, but roll them in cinnamon-sugar and they do taste like donut holes. These are pumpkiny, cinnamon-sugary, and perfect for autumn. Make them for breakfast and eat them warm from the oven with a big glass of milk!

baked cinnamon-sugar donut holes

ingredients:

For the Donuts:
1 & 3/4 cups all-purpose flour
1 tsp baking powder

1 tsp baking soda
1/2 tsp salt
2 tsp cinnamon
1 tsp nutmeg
1 tsp allspice
1/4 tsp ground cloves
1/3 cup canola oil
1/2 cup light brown sugar
1 large egg
1 tsp vanilla extract
3/4 cup canned plain pumpkin {not pumpkin pie filling}
1/2 cup skim milk

For the Coating:
4 tsp unsalted butter, melted
2/3 cup granulated sugar
2 tbsp cinnamon

1. Preheat oven to 350 degrees. Spray a mini muffin tin with baking spray and set aside.

2. In a medium bowl, whisk together flour, baking powder, salt, cinnamon, nutmeg, allspice, and cloves. In a separate, large bowl whisk together oil, brown sugar, egg, vanilla, pumpkin and milk until smooth. Add dry ingredients to wet ingredients and mix until just combined.

3. Divide batter evenly among muffin cups.

4. Bake for 10-12 minutes or until a toothpick comes out clean.

5. While the muffins bake, melt butter in one bowl and combine granulated sugar and cinnamon in another bowl.

6. Remove muffins from oven and cool for 2 minutes. Dip each muffin in melted butter, then roll in cinnamon sugar to coat. Serve muffins warm or at room temperature.

{This recipe is adapted from The Craving Chronicles.}

YUM. And easy! And {for a donut} relatively healthy, too! Hard to beat that. 🙂

Happy autumn!
-Dallas

—————————

Time spent: about 30 minutes
Cost: about $5

peach streusel muffins

Happy weekend everyone! Hope you are out doing something relaxing, lovely and joyful. It is a gorgeous sunny crisp fall day here in West Lafayette, and I am soaking it in! My plans for the day include lunch at Panera, doing some work there, and then going for a nice walk down by the river. I’m making orange chicken with veggies in the crock-pot for dinner tonight … I’ll let you know how it turns out!

You may remember a few weeks ago I found a recipe on the blog Stacey Snacks for peach streusel muffins … at the time I didn’t have any peaches so I adapted it to make blueberry streusel muffins. They turned out great! However, I was eager to try it with peaches as the original recipe called for, and I finally did.

The results were incredible! These just might be my favorite muffins ever. Stacey was right about the combination of the peaches and the streusel topping … heavenly!

I was a little intimidated first by the streusel topping, but believe me it is super easy to make. These muffins are also a healthy breakfast or snack {or even tasty enough for a healthy dessert!} because they are packed with peaches and use applesauce and protein-packed Greek yogurt in place of oil.

peach streusel muffins

for the topping:
– 1/3 cup uncooked oatmeal
– 1/3 cup all-purpose flour
– 1/3 cup firmly packed light brown sugar
– 1 tsp ground cinnamon
– 3 tbsp unsalted butter, softened

for the muffin batter:
– 2 cups all-purpose flour
– 1/2 cup sugar {or 1/4 cup stevia/truvia}
– 1 tsp baking powder
– 1/2 teaspoon baking soda
– 2 tsp ground cinnamon
– 1/2 teaspoon salt
– 3 eggs
– 1 tbsp unsalted butter, melted
– 1 cup Greek yogurt
– 1/4 cup unsweetened applesauce
– 1 tbsp pure vanilla extract
– 2 ripe peaches, cut into chunks {I like mine with the skin on for extra nutrients, but you could certainly peel them if you prefer}

1. For the topping: In a small bowl, combine the flour, brown sugar and cinnamon. Stir in the butter, and mix until well blended. Set aside.

2. Preheat the oven to 375 degrees. Line muffin cups with paper liners or spray with nonstick spray.

3. In a medium bowl, sift together the dry ingredients, from flour to salt, and set aside.

4. In a separate bowl, whisk the eggs, butter, yogurt and vanilla.

5. Add the egg mixture to the dry mixture. Stir until just moist and blended, being careful not to overmix.

6. Fold in the peaches.

7. Scoop the batter into the prepared muffin pan until the batter comes to the top of the paper liner or pan. Sprinkle with the brown sugar streusel topping, and lightly press the topping into the muffin batter.

8. Bake for 22-25 minutes, until tops are golden brown and a knife inserted in the middle comes out clean.

Have a scrumptious weekend!

❤ Dallas

—————————-

-Time spent: about 1 hour {including bake time}
-Cost: less than $5

You might also enjoy these previous posts:
blueberry/blackberry/raspberry muffins
good morning sunshine muffins
coconut zucchini muffins

incredibly easy pumpkin spice cookies

In honor of tomorrow being the Autumnal Equinox, or first official day of autumn, I decided to celebrate by baking these incredibly yummy — and incredibly easy! — pumpkin spice cookies.

I came across this recipe about a month ago on one of my favorite blogs, Peanut Butter Fingers — I absolutely love pumpkin desserts and pastries, so right away I was on board. Then, when I saw that all you need is TWO ingredients to make these cookies, I was amazed. I knew I needed to try out this recipe for myself!

These cookies are thick, moist, and full of pumpkin goodness. They were super delicious warm from the oven yesterday and they still tasted fresh when I had a few for dessert tonight. Plus, since there is no butter, oil, or even eggs in this recipe — and pumpkin is a great source of Vitamin A and C — these are pretty healthy as far as cookies go!

Whip up a batch of these cookies and enjoy a taste of autumn!

pumpkin spice cookies

– 1 box of spice cake mix {I used Duncan Hines}
– 15 oz can of pumpkin
– chocolate chips, marshmallow, white chocolate chips, nuts {optional mix-ins for the cookies}

1. Preheat your oven for 350 degrees.

2. In a large bowl, dump the cake mix and pumpkin. It will look like this:

3. Keep stirring until the pumpkin and cake mix are fully combined. The batter will be thick! {This recipe doubles as a great arm workout, haha!}

4. Drop the pumpkin by spoonfuls onto a greased cookie sheet or onto a cookie sheet lined with parchment paper.

5. If you’d like, add chocolate chips, marshmallows, or nuts to some of the cookies. {I used white chocolate chips and semi-sweet chocolate chips in about half the cookies, and the rest I made plain.}

6. Bake 15-20 minutes or until cookies are firm in the middle.

Yummmm… ENJOY!

Happy autumn, everyone!
-Dallas

—————————

-Time spent: 30 minutes {including bake time}
-Cost: about $4.00

blueberry streusel muffins

I spent a rainy afternoon last weekend at Starbucks writing, reading and grading. Sometimes it’s nice to just get out of the apartment — if I stay inside all day without getting out at all, I start to feel a little claustrophobic. I call it the “closed-in feeling” and when it hits, the only solution is to grab my bag and books and keys and head out! Even just heading down the street to Starbucks is enough to clear my head and get me into productive mode.

I ordered my usual Zen green tea and since I was a little hungry I also tried a blueberry muffin. I really loved the crumb topping and as soon as I got home, I thought: I want to make my own version!

So this morning that’s what I did.

I found this recipe on the blog Stacey Snacks for peach streusel muffins … I didn’t have any peaches so I adapted it to make blueberry muffins. I’m looking forward to trying the recipe with peaches sometime soon though! The photos on Stacey’s blog look amazingly scrumptious.

Here’s how my blueberry streusel muffins turned out:

blueberry streusel muffins

for the topping:
– 1/3 cup uncooked oatmeal
– 1/3 cup all-purpose flour
– 1/3 cup firmly packed light brown sugar
– 1 tsp ground cinnamon
– 3 tbsp unsalted butter, softened

for the muffin batter:
– 2 cups all-purpose flour
– 1/2 cup sugar {or 1/4 cup stevia/truvia}
– 1 tsp baking powder
– 1/2 teaspoon baking soda
– 2 tsp ground cinnamon
– 1/2 teaspoon salt
– 3 eggs
– 1 tbsp unsalted butter, melted
– 1 cup Greek yogurt
– 1/4 cup unsweetened applesauce
– 1 tbsp pure vanilla extract
– 1 & 1/2 cups blueberries

1. For the topping: In a small bowl, combine the flour, brown sugar and cinnamon. Stir in the butter, and mix until well blended. Set aside.

2. Preheat the oven to 375 degrees. Line muffin cups with paper liners or spray with nonstick spray.

3. In a medium bowl, sift together the dry ingredients, from flour to salt, and set aside.

4. In a separate bowl, whisk the eggs, butter, yogurt and vanilla.

5. Add the egg mixture to the dry mixture. Stir until just moist and blended, being careful not to overmix.

6. Fold in the blueberries.

7. Scoop the batter into the prepared muffin pan until the batter comes to the top of the paper liner or pan. Sprinkle with the brown sugar streusel topping, and lightly press the topping into the muffin batter.

8. Bake for 22-25 minutes, until tops are golden brown and a knife inserted in the middle comes out clean.

Update: These were delicious right out of the oven, and still moist and fresh-tasting a couple days later when I finished the last of the batch. They’re a great way to use up the last of your summer blueberries! I especially loved the streusel topping!

YUM!

Have a delightful day, everyone!

Always,
Dallas

—————————-

-Time spent: about 1 hour {including bake time}
-Cost: less than $5

You might also enjoy these previous posts:
blueberry/blackberry/raspberry muffins
good morning sunshine muffins

rice krispies treats with m&ms

Last weekend I went to a welcome-back potluck for my Master’s program and I volunteered to bring dessert. {I always volunteer to bring dessert — any excuse to bake!} I racked my brain for something to make. Cookies? Cupcakes? Lemon bars? But with a busy weekend to-do list of errands and course planning, I was a little pressed for time. I thought back to picnics and potlucks of my childhood, when my mom would often bring Rice Krispies treats — they used to be one of my favorite desserts. I couldn’t remember the last time I’d had a Rice Krispies treat. A craving hit and it was immediately decided: I would try my hand at making some for the potluck!

Lucky for me, this recipe could not be simpler. It’s the perfect, inexpensive crowd-pleaser for any gathering — especially in the summer, when you don’t want to heat up your kitchen by turning on the oven. This would also be a fun recipe to make with kitchen-helper kiddos!

Looking for a dessert to bring to a Labor Day picnic? Try whipping up some of these!

rice krispies treats with m&ms

-1 package mini-marshmallows
-1/3 cup butter
-1 large bag mini m&ms
-6 cups rice krispies

1. Grease a 9 x 13 pan with butter and set aside. Melt the rest of the butter in a big pot on the stove. When butter is halfway melted, add the marshmallows.

2. Stir until the marshmallow is completely melted and smooth.

3. Turn off the burner. Add the rice krispies two cups at a time, stirring thoroughly until the mixture is combined.

4. Add a heaping cupful of the mini m&ms. {Feel free to use whatever kind of m&ms you want; I like the minis because they are so dang cute!}

5. Press the rice krispies mixture into the greased 9×13 pan. Pour the remainder of the m&m bag onto the top of the rice krispies and press down with a spatula.

6. Let cool for 15-20 minutes {or as long as you can stand it} before slicing into squares and serving.

Have a delightful weekend, everyone! I’ll be soaking up these last rays of summer before autumn sweeps in …

xoxo,
Dallas

————————–

Time spent: 15 mins
Cost: $6.00 {with about half a box of rice krispies left over for breakfast this week!}