cilantro-lime quinoa with chicken

Happy Wednesday, everyone! Hope your week is going great!

I’m excited to share this quick & healthy dinner recipe with you today: I adapted this recipe from LaaLoosh and made it a little heartier by adding chicken. {Her post lists it as a side dish; Mike and I ate it as a main dinner dish.}

cilantro-lime quinoa with chicken

  • 1 cup quinoa
  • 1 medium onion, diced
  • 1 yellow bell pepper, diced
  • 3 tsp minced garlic
  • 2 chicken breasts, diced
  • 2 cups fat free vegetable broth
  • a 4oz can green chiles
  • 2 tbsp lime juice {I used the juice of one lime}
  • 1/2 cup green onions, chopped
  • zest from 1 lime
  • 2/3 cup cilantro, finely chopped
  • salt and pepper to taste
  • optional: 1 jalapeno, seeded and finely chopped {I did not use a jalapeno because I am a wimp when it comes to spicy things, but I’m sure it would be tasty if you’re feeling daring!}

1. Spray a pot with non-fat cooking spray and set over medium high heat. Add the onion, bell pepper, chicken and garlic and sauté until tender and fragrant, about 7-8 minutes. {If mixture sticks to the pan, add in a bit of the broth to deglaze.}

2. Stir in chiles and cook for another 2 minutes.

3. Add in quinoa and remaining broth and bring to a boil.

4. Reduce heat to a gentle simmer, cover and cook until the quinoa is tender and most of the liquid has been absorbed {about 25 to 30 minutes.}

5. Add in remaining ingredients and fluff with a fork. Serve immediately.

This smelled SO good cooking! Mike and I were so hungry that I forgot to take a picture of our bowls before we began to eat. All I have for you is a picture of the meager leftovers in a Tupperware container, ready to go into the fridge for lunch the next day.

quinoa

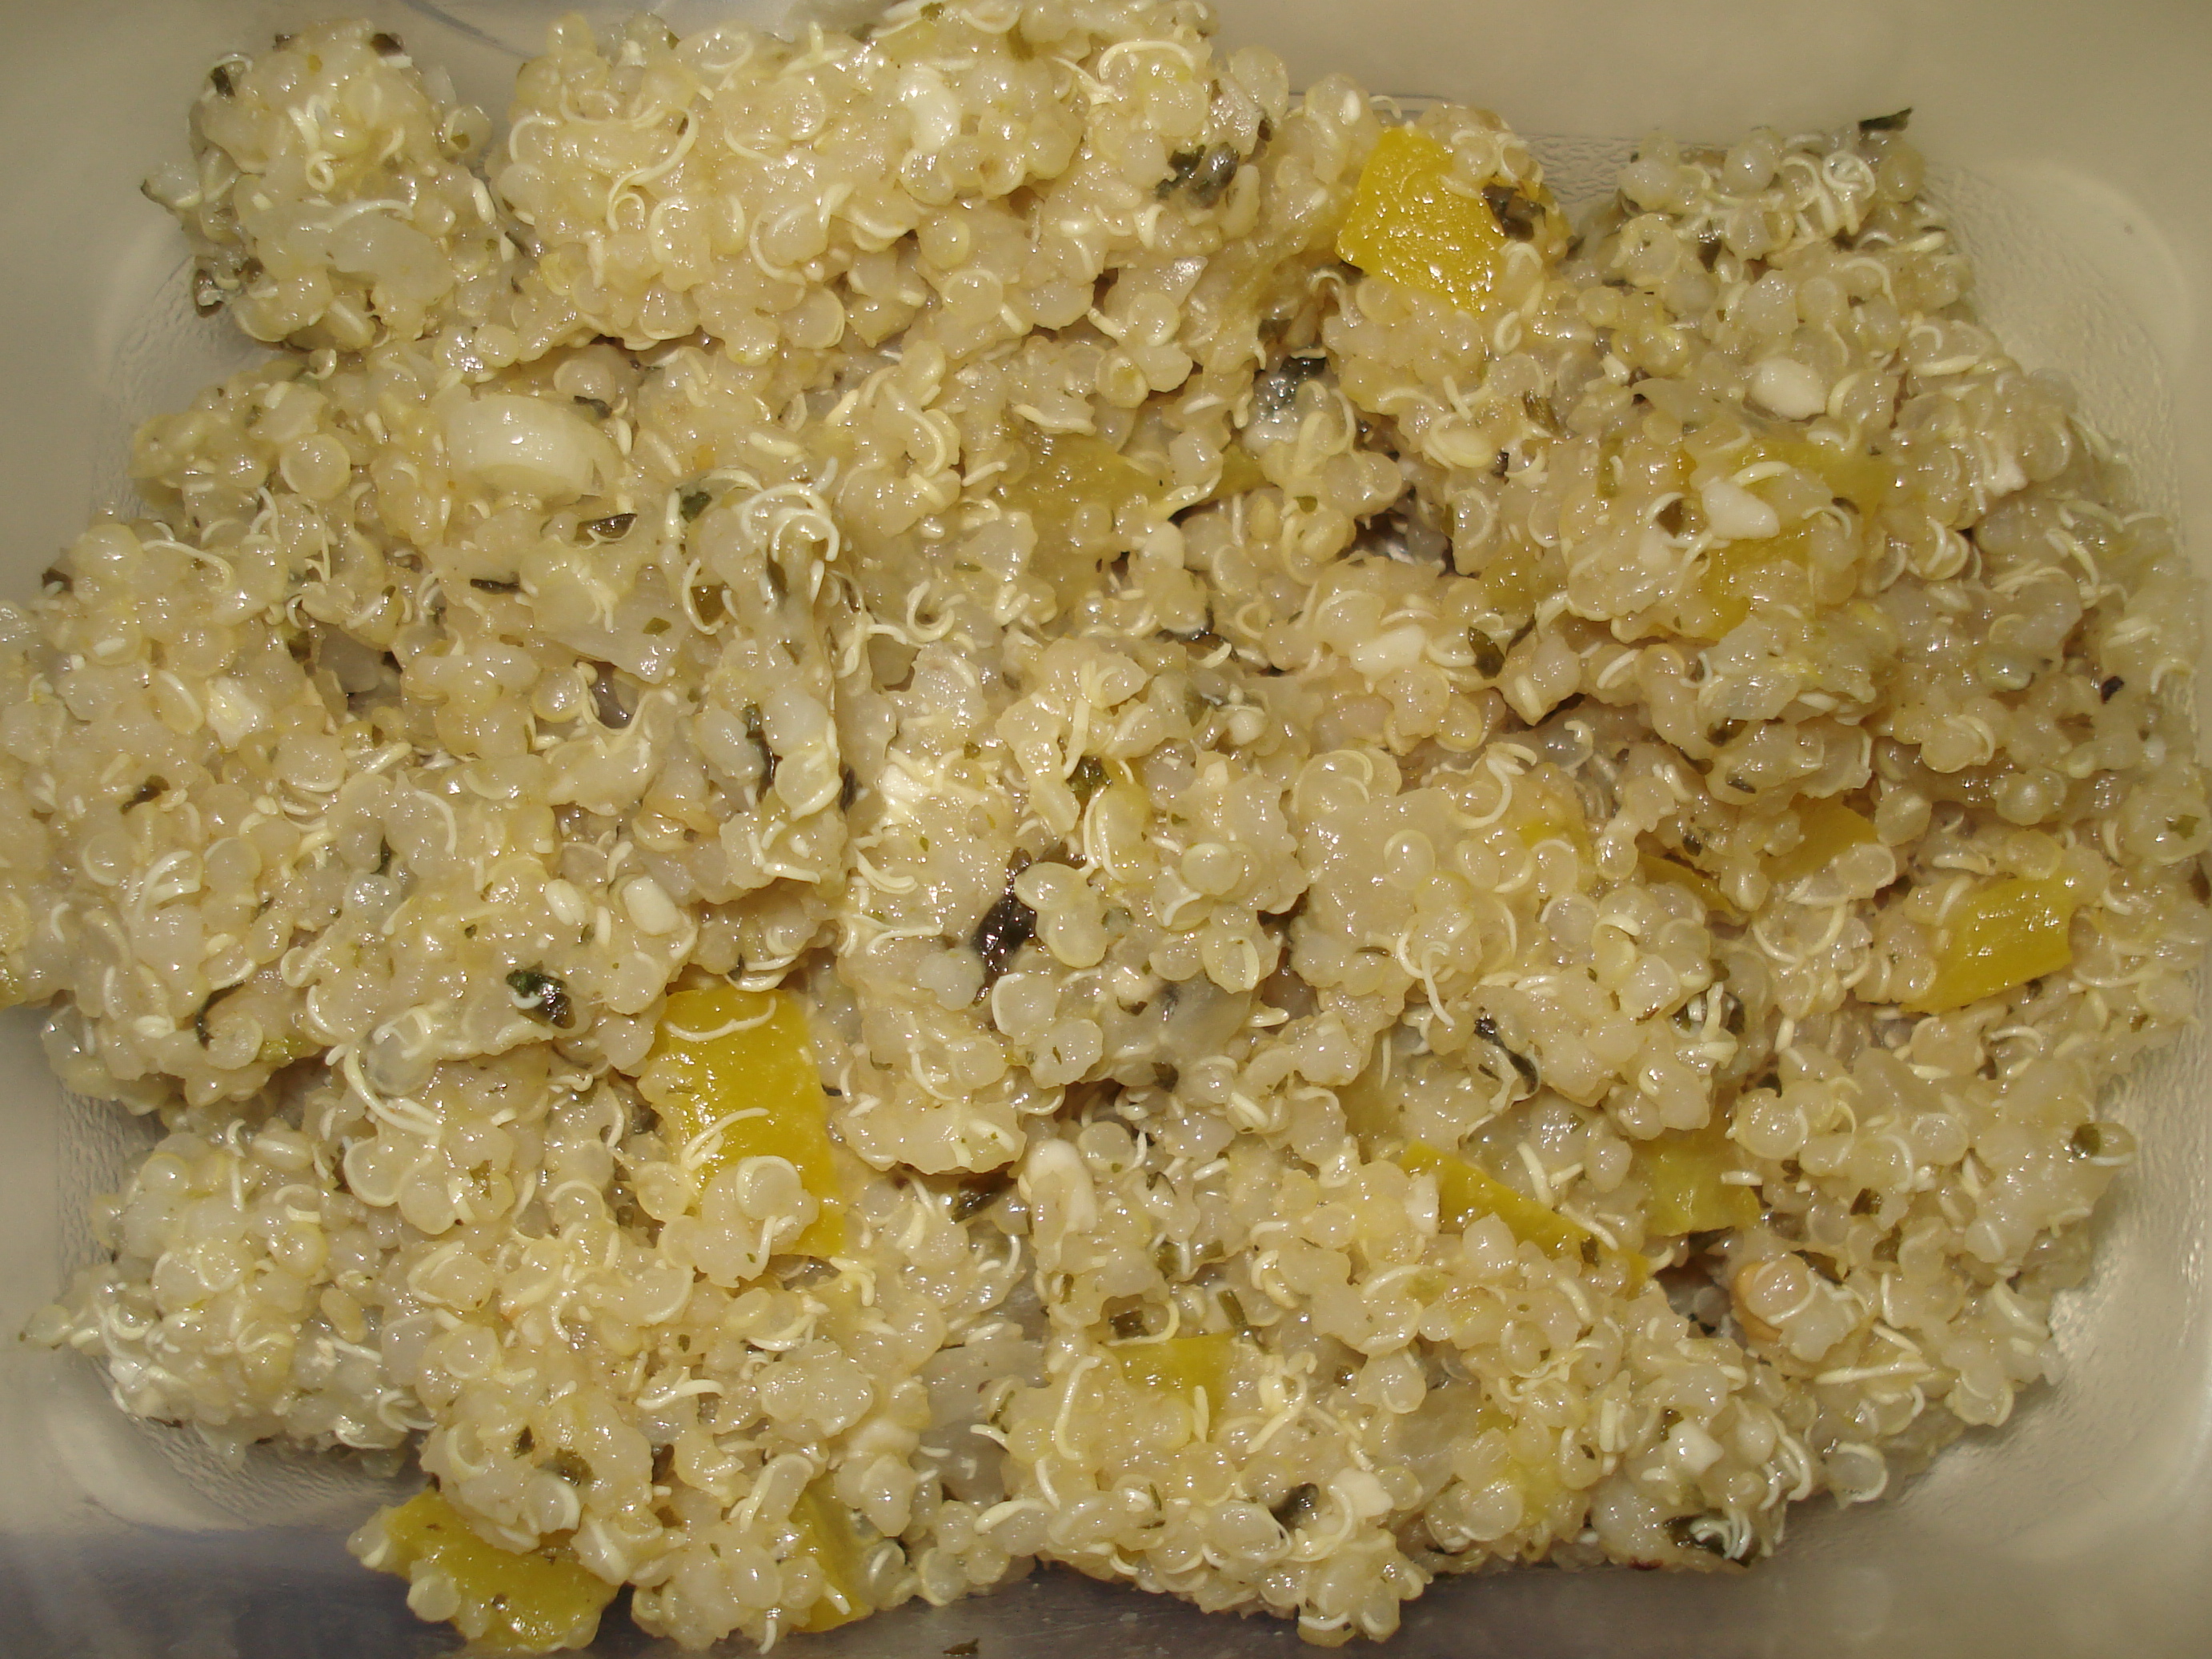
You’ve just gotta trust me … it was delicious!!

This recipe is definitely a make-again for us! And with the mix of quinoa and chicken, it’s a healthy dish that will also keep you satisfied — perfect to get a healthy start on the new year.

What are some of your favorite healthy yet hearty recipes?

If you liked this post, you might also enjoy:
chicken & quinoa salad
honey-lime chicken enchiladas
crock-pot chicken w/black beans & corn

This post is linked up with Menu-Plan Monday!

MPM-Winter

saving money & time by utilizing my freezer

One of my goals for this year is to put at least 10% of each paycheck into my savings. I’ve always been a saver — I was the kid who saved up my Chuck E. Cheese ticket winnings visit after visit to eventually spend on the coveted 1,000-Ticket Big Prize — but in the grown-up world saving isn’t always that easy. As a grad student, there are months it seems downright impossible to put aside any of my small paycheck for savings. Yet I know how important it is to save for the future, and I know how fortunate I am to have a job — after all, even a small paycheck is better than no paycheck.

With that mindset — that even small savings deposits are better than no savings! — I am aiming to discover little ways to save money throughout my daily living. Since I hate wasting food, I’ve gotten in the habit of buying small amounts of produce every week — even produce I really like and eat often — because I don’t want anything to go bad and go to waste. Sometimes this caused me to lose out on good weekly deals because, though I knew I would use up a lot of that specific fruit or vegetable, I wasn’t sure if I would eat it quickly enough. This also lead to some situations where it felt like I was racing against the clock to eat up all of the peaches or blackberries or celery before it went bad and into the trash.

freezing produce

Then I came across this post from my blogging buddy Andrea at Simple Organized Living about how she cuts up and freezes her fruits and veggies {and lots of other goodies, too!} … and it really inspired me! It seems so obvious, but it had never occurred to me that I could freeze my fruits and veggies and use them later. It was like a light-bulb went on in my brain!

Serendipitously, this week at the grocery store, they were having a great sale on bell peppers, something I use often in my cooking. Normally I would have bought one, maybe two, and made sure to use them up in dishes this week. But now I knew exactly what to do to take full advantage of the sale: use my freezer!

I bought half a dozen bell peppers, used two in recipes this week just like I normally would have, and then took a few extra minutes to chop up the rest. Then all I had to do was put them into ziplock baggies and into the freezer!

bell peppers

I used one small bag per bell pepper, because typically my recipes use one bell pepper at a time. An extra bonus is that cooking with these frozen veggies will be easier than ever because the chopping is already done! Surprisingly, it seemed much faster to get in the zone and chop up four bell peppers in one go than it does chopping them up one at a time.

And I felt so proud putting these babies into the freezer. I pictured a harried, midterm version of my Future Self, hungry and desperate to get dinner on the table, and I thought, “This is my gift to you, Future Self.  You’re welcome!”

Do any of you use your freezer to stock up on produce? I’d love to hear your money-saving tips!

chocolate-chip banana muffins

One of the first baking recipes I ever learned to make was my mom’s banana bread. To me, banana bread just tastes like home. And it’s a great recipe for someone like me who hates to waste food. I prefer to eat bananas when they are just ripening, still a little green at the tips. When they begin to get brown spots, I really don’t care for them. But thanks to Mom, I don’t have to worry about them going to waste — I just whip up a batch of banana bread…

…or banana muffins! In the past few years I’ve gotten really into making muffins instead of bread because I just find muffins so much more portable — easy to slip into a lunchbox or grab for breakfast on the way out the door. {That said, you could easily adapt this recipe for a loaf of bread if you’d prefer!}

I added chocolate chips to Mom’s recipe for a little extra treat to start the school year off right. 🙂 Hope you enjoy these as much as I do!

DSC00005

chocolate-chip banana muffins

  • 1/3 cup butter or margarine
  • 1/2 cup sugar
  • 2 eggs
  • 1 tsp vanilla
  • 1 & 3/4 cup flour {I used whole-wheat flour}
  • 1 tsp baking soda
  • 1 tsp baking powder
  • 1/2 tsp salt
  • 1 cup ripe mashed bananas {I used two bananas}
  • 1 cup chocolate chips

1. Preheat oven to 350 degrees. Line muffin tin with paper cups and set aside.

2. In a large bowl, cream together butter and sugar. Add the eggs and vanilla and beat well.

3. In a separate bowl, sift together dry ingredients.

4. Add a portion of the dry ingredients to the wet ingredients, mixing well. Then add a portion of the mashed bananas. Continue alternating dry ingredients and mashed bananas until the entire mixture is combined. {Batter will be slightly lumpy due to the bananas.}

DSC00052

5. Add chocolate chips.

6. Spoon batter into paper muffin cups, about 3/4 of the way full.

DSC00004

7. Bake for 22-25 minutes, until golden brown and a toothpick inserted in the center comes out clean.

DSC00006

Enjoy! These are great for breakfast, a mid-afternoon snack, and also make a great healthy dessert!

Hope your week is going great,
-Dallas

goals & menu plan for the week of 1/6

Hi everyone! Hope you are having a lovely Sunday. It’s been a calm, cozy weekend here in West Lafayette, with lots of green tea, unpacking, and reading on my agenda. {It always floors me how long it seems to take to unpack all my stuff after a trip, especially a month-long trip home when I have two big suitcases crammed full!} Mike and I also watched a couple movies this weekend: the clever romantic comedy Ruby Sparks {I definitely recommend this one!} and the campy horror flick Drag Me to Hell {okay, I didn’t really watch this one —  I’m a wimp when it comes to horror movies! I baked in the kitchen while Mike watched it in the living room. He gave it a 1.5 thumbs up.}

I can’t believe school starts tomorrow! Actually, it officially starts on Tuesday for me — I don’t teach on Mondays this semester — but I will probably still go to campus to get some work done and straighten up my office for the new year. If any of you are starting back to school tomorrow, too, I hope the semester is a great one for you! 🙂

Here are my goals for the week:

  • finish planning out entire semester of lessons for both courses I’m teaching
  • submit fellowship application at least one week before the deadline
  • debut first Act of Kindness on blog {tomorrow!} and complete it myself this week
  • write out responses and pack for Key West
  • finish Christmas thank-you notes
  • begin new knitting project
  • finish the new one-act play I’ve been working on
  • finish reading Who’s Irish? by Gish Jen {a wonderful short story collection I began reading last semester and then never finished}

I also made a weekly goal check-off sheet to keep track of my progress on bigger yearly goals that it can be difficult to keep a handle on over the course of an entire year. I find that if I am able to check something off my list every day, it makes me feel more motivated and productive, and soon turns that goal into a habit. Feel free to download my goal list for the week and fill it in with your own goals!

I’ll close off with the list of meals I’m planning to make this week:

Have a wonderful week!

*This post is linked up with Menu-Plan Monday at I’m an Organizing Junkie.*

mom’s classic chocolate-chip cookies

My mom makes AMAZING chocolate-chip cookies! Back in college she’d send me big batches of chocolate-chip cookies and my dorm-mates would actually cheer. {I would share them of course!} Hmmm, thinking about it now, maybe I should thank Mom for helping me make friends! 🙂

This year, Mom gave me her recipe and I tried my hand at making a batch … they didn’t turn out quite as well as hers, but still pretty darn delicious. Crispy, buttery edges; gooey chocolatey middles. It’s hard to go wrong with a chocolate-chip cookie!

chocolate chip cookies

mom’s classic chocolate-chip cookies

– 2 and 1/4 cups flour
– 1 tsp baking soda
– 1 tsp baking powder
– 1 tsp salt
– 1 tsp cinnamon
– 1 cup butter, softened
– 3/4 cup sugar
– 3/4 cup packed brown sugar
– 1 tsp vanilla extract
– 2 large eggs
– 1 package semi-sweet chocolate chips

1. Preheat oven to 375 degrees and line a baking sheet with parchment paper.

2. Cream butter through sugar.

butter & sugar

3. Add eggs and vanilla and beat well.

4. Sift together flour, baking soda, baking powder, and salt.

flour mixture

5. A little at a time, add flour mixture to wet ingredients, stirring well to combine thoroughly.

cookie batter

6. Add chocolate chips and cinnamon, if desired.

chocolate chip batter

7. Scoop by tablespoons onto a baking sheet.

cookies prebake

8. Bake for 12-15 minutes, until cookies are golden-brown and firm to the touch.

cookies baked

9. Allow to cool for 5 minutes, then remove from baking sheet.

I like these cookies best when they’re still warm — and of course with a big tall glass of milk!

choc chip cookies

Hope you are enjoying these last couple days before Christmas!

-Dallas

———

If you enjoyed this post, you might also like:

butterscotch pudding cookies
aunt elaine’s peanut butter blossoms
apple, brown sugar & cinnamon cookies
pumpkin oatmeal cookies

This post is linked up to Menu-Plan Monday!

MPM-Winter

what I wore to teach writing camp

I was delighted to teach a special one-day winter break session of my youth writing camp this past weekend! It was so much fun. I always come away from teaching creative writing sessions thinking, “I hope my students had even half as much fun as I did!” 🙂

When deciding upon what to wear to teach writing camp, I tried to come up with an outfit that was:
1) fun
2) professional, and
3) warm {it was cold by California standards this weekend!}

Inspired by Deme at Fresh Coat of Paint, I ended up layering a sweater underneath a pretty summer dress and pairing it with tights and flats. I also added some sparkly jewelry and a flower barrette for extra flair.

writing camp outfit

Here’s a back view:

writing camp outfit

I was pleased with the outcome! I think the pop of bright blue made for a cheerful and inviting look, which is great when working with young people and trying to establish and open, fun and safe classroom environment. {And I’m linked up at Fine Linen & Purple, woo hoo!}

I was really excited to find these babies at the grocery store yesterday:

pumpkin marshmallows

PUMPKIN MARSHMALLOWS!!

I used them to make a pumpkin-y batch of my rice krispies treats, which I brought to writing camp as a snack for the kids. They gobbled them up! The pumpkin marshmallows are a nice seasonal change from regular marshmallows. Highly recommended!

rice krispie treats pumpkin

Hope your day is going wonderfully!

-Dallas

———–

You might also enjoy these posts:

what I wore to thanksgiving dinner
what I wore to see “the nutcracker”
rice krispies treats with m&ms

my aunt elaine’s peanut butter blossoms

I have a delicious holiday cookie recipe to share with you today! My mom makes these every holiday season and they are always one of my favorite treats. You could make them any time of year, but in my family they are a special sign of Christmas!

I made these as a treat for my students for the last day of class. They are a classic combination of peanut butter and chocolate — what could be better? I like that they look special and pretty yet are very simple to make. I even health-i-fied my aunt’s recipe a little bit by cutting down on the sugar and substituting whole-wheat flour for regular white flour, and they turned out just as delectable as I remembered.

Enjoy! 🙂

DSC00021

aunt elaine’s peanut butter blossoms

– 1/3 cup sugar
– 1/3 cup brown sugar
– 1/2 cup butter
– 1/2 cup peanut butter
– 1 egg
– 2 tbsp milk {I used soy milk}
– 2 tsp vanilla
– 1 & 3/4 cup whole-wheat flour
– 1/2 tsp baking soda
– 1/2 tsp baking powder
– 1/2 tsp salt
– 25 Hershey’s kisses {I used the dark chocolate variety!}
– extra 1/4 cup or so of sugar for rolling the dough in before baking

1. Preheat oven to 375 degrees and line a cookie sheet with parchment paper.

2. In a large bowl, cream together butter and sugar. Add egg and vanilla and beat well. Blend in peanut butter and milk.

3. In a separate bowl, sift together flour, baking soda, baking powder, and salt.

4. Add dry ingredients to wet ingredients and stir together.

cookie batter

5. Spread a thin layer of sugar in the bottom of a shallow dish {a pie pan is perfect!}

6. Shape teaspoonfuls of dough into small balls and roll them around in the sugar until they are evenly coated. Place them onto the cookie sheet, evenly spaced.

cookies prebake

7. Bake for 12-14 minutes, until cookies are golden brown and cracked open and a toothpick inserted in the center comes out clean.

cookies postbake

8. While cookies are baking, unwrap the Hershey’s kisses so they are ready to go when cookies come out of the oven!

9. When cookies are still warm, place a Hershey’s kiss in the center of each cookie, gently pressing down to attach the chocolate to the cookie as it cools.

pb blossoms

What are some of your favorite holiday cookie recipes?

Happy Friday!
-Dallas

You might also enjoy these holiday recipes:

white chocolate m&m pretzels
chocolate-covered popcorn
perfect pumpkin pie

homemade christmas gifts

When I think back on my favorite gifts I’ve ever received, they are not the most expensive or glamorous, but the most thoughtful. Many of them are homemade: the blue-jean quilt sewn by my grandmother and passed down to me; the handwritten letters my dad writes for me on each birthday; the paintings made for me by my brother. My other most treasured gifts are not “things” at all but experiences: the “girls trips” I’ve taken with my mom; the Taylor Swift concerts I’ve been to with my friend Holly; the time my Gramps took me on a tour of the small Ohio town of his boyhood; the trip to Ireland I took with my brother to explore our family’s Irish roots.

holiday masterpiece

This holiday season, I am approaching gift-giving not as a money-draining, stressful obligation, but instead as a fun challenge. How can I show all of the people I care about how much I care about them? How can I be thoughtful and proactive in gift-giving without breaking the bank?

My answer: homemade, personal gifts.

I mentioned in a post last week about my quest to upcycle gift containers rather than waste money on brand-new bags and boxes. Not only is this good for my wallet, it’s also good for the environment — AND it seems more thoughtful and personal, to boot!

One of my favorite homemade gifts to make for loved ones is hand-knitted scarves. My junior year of college, I studied abroad in England and my friends Janet & Lauren taught me how to knit. Ever since then, I constantly have some sort of knitting project going. {It’s a great project to do while watching TV or on long car rides!} My favorite thing to make is scarves because they are straightforward, versatile, and get a lot of use. With each stitch, I love thinking of the recipient wearing the scarf and staying warm during a cold winter day.

scarf

One Christmas, I made a “scarlet and gray” spirited scarf for my Gramps to wear to cheer on his beloved Ohio State football team. It was one of the first scarves I ever made and I worked on it painstakingly for months, trying to make my rows even and neat. I was so proud of myself when the scarf was completed. And my Gramps’s surprised smile upon opening the gift is one of my favorite Christmas memories!

me and gramps

Here are some good online tutorials for how to knit a scarf:

– http://www.wikihow.com/Knit-a-Scarf
– http://www.youtube.com/watch?v=OqeG05HFP1E
– http://www.ehow.com/video_12221356_knit-scarf-beginner.html

I also love to give homemade baked goods as gifts. I mean, think about it: even “the person who has everything” could appreciate a nice big batch of still-warm-from-the-oven brownies, right? 😉 To me, homemade food gifts carry the message of comfort, delight, and indulgence. One year, Holly mailed me a batch of cookies all the way across the country and they made me feel SO special and loved — I swear those were the most delicious cookies I’ve ever eaten!

holiday treats

Here’s a wrap-up of some of my favorite recipes for delicious holiday treats that would also make great gifts:

holiday white chocolate pretzels
butterscotch pudding cookies
chocolate-covered popcorn
pumpkin-oatmeal cookies
red velvet cupcakes with coconut cream-cheese frosting
rice krispies treats with m&ms

Making someone a homemade gift is almost like prayer: as you work on the gift, you spend time thinking good thoughts about the person and how much you care about them and how lucky you are to have them in your life. I love homemade gifts because, to me, they are the ultimate testament to the warmth, joy, gratitude and selflessness of the holiday season.

Are you making any homemade gifts this year? What are some of your favorite gifts you’ve ever received?

homemade chocolate-covered popcorn

I read in a magazine recently that popcorn contains more antioxidants than some fruits and vegetables! Adding to that, one cup of popcorn {the healthy, air-popped variety, that is} has less than 50 calories! Hello, my new favorite snack. I also love popcorn because it is so versatile – you can add seasonings to make it salty, cheesy, spicy, or sweet.

Or … kick it up a step further and add some chocolate to the mix! {I know, I know, this definitely crashes-and-burns the whole “under 50 calories” thing … but the way I see it, chocolate-covered popcorn is pretty healthy on the dessert scale!} I made mine with dark chocolate to take advantage of even more antioxidant power.

chocolate popcorn

Before making this dish, I had never even attempted to melt chocolate before. I do not have a double-broiler so I just used my microwave. I was worried it would be difficult or time-consuming, but it was incredibly easy. I am already looking forward to livening up my next movie night in with Mike by whipping up another batch of this addicting treat!

homemade chocolate-covered popcorn

– 1 package popcorn of choice {I like to use a healthy, whole-grain version with no added butter or salt}
– 1/2 cup chocolate chips
– 2 tsp butter
– salt, cinnamon, or other spices to taste

1. Pop popcorn according to package directions. Dump into a big bowl and pick out any unpopped kernels. Sprinkle with salt and cinnamon.

2. Melt chocolate and butter over a double-burner or in a microwave-safe bowl. {Melting times vary based on the power of your microwave, but I’d recommend using a series of shorter time increments and stirring more often so as not to burn the chocolate by cooking too long!}

3. Pour melted chocolate onto the popcorn.

popcorn

4. Using a spoon {or your hands!} mix popcorn and chocolate together, breaking apart any large clumps of chocolate, until the popcorn is evenly coated.

chocolate covered popcorn

5. Allow to cool, then store in an airtight container.

I gifted a batch of this popcorn to a coworker using a homemade “upcycled” gift container. I’ll share more about making homemade gift containers in my post tomorrow, so stay tuned! 🙂

upcycled gift containers

Have a wonderful day!

Till soon,
Dallas

cake or cake-pops?

Happy Friday, everyone! Hope your day is going wonderfully.

I have a quick question that I’d love your feedback on. I’m hosting a party in a couple weeks and I am trying to decide whether to serve cake or cake-pops.

I like cake because it’s traditional, substantial, and satisfying {seriously, who doesn’t love being served a big slice of cake?}

birthday-cake_21134700

But I’m torn because cake-pops seem so cute and fun and party-friendly. Plus, you can serve a variety of flavors.

chocolate-raspberry-cake-pops-gluten-free-recipe

What do you think?