creamy blended cauliflower & potato soup

Look what I got!

stick blender

Yaaaaay, a stick blender! I’ve been wanting one of these ever since I started cooking more at home and using my regular stand blender to make dishes like homemade hummus. I love my stand blender, but cleaning it out can be a pain — the stick blender appealed to me when making smaller blended dishes like personalized morning smoothies, or …

… creamy blended soups like this one!

cauliflower potato soup

As soon as I came across this recipe on Two Peas & Their Pod, I knew I had to try it out with my new immersion blender! It turned out great, and was much easier than I expected. If you don’t have an immersion blender, you could use a regular stand blender to blend this soup in batches. I tweaked it slightly, omitting the cheese and adding potato and kale. Here’s my recipe:

creamy cauliflower & potato soup

– 1 head of cauliflower, cut into florets
– 1 russet potato, diced
– 3 tsp minced garlic
– 2 tablespoons olive oil
– 1 medium onion, diced
– 2 celery stalks, diced
– 1 cup chopped kale
– 4 cups vegetable broth
– 2 teaspoons thyme
– 1 tablespoon rosemary

1. Preheat the oven to 400 degrees F.

2. Toss cauliflower and potatoes with olive oil and a dash of salt and pepper. Spread evenly on a cookie sheet and bake for 20-30 minutes, until cauliflower is golden brown.

roasted cauliflower

3. While cauliflower and potato mixture is roasting, saute onion, garlic and celery in olive oil over medium heat for 5-7 minutes. Add vegetable broth, kale, thyme and rosemary and bring to a boil.

4. Add roasted cauliflower and potato. Simmer 20-25 minutes, until vegetables are tender.

soup

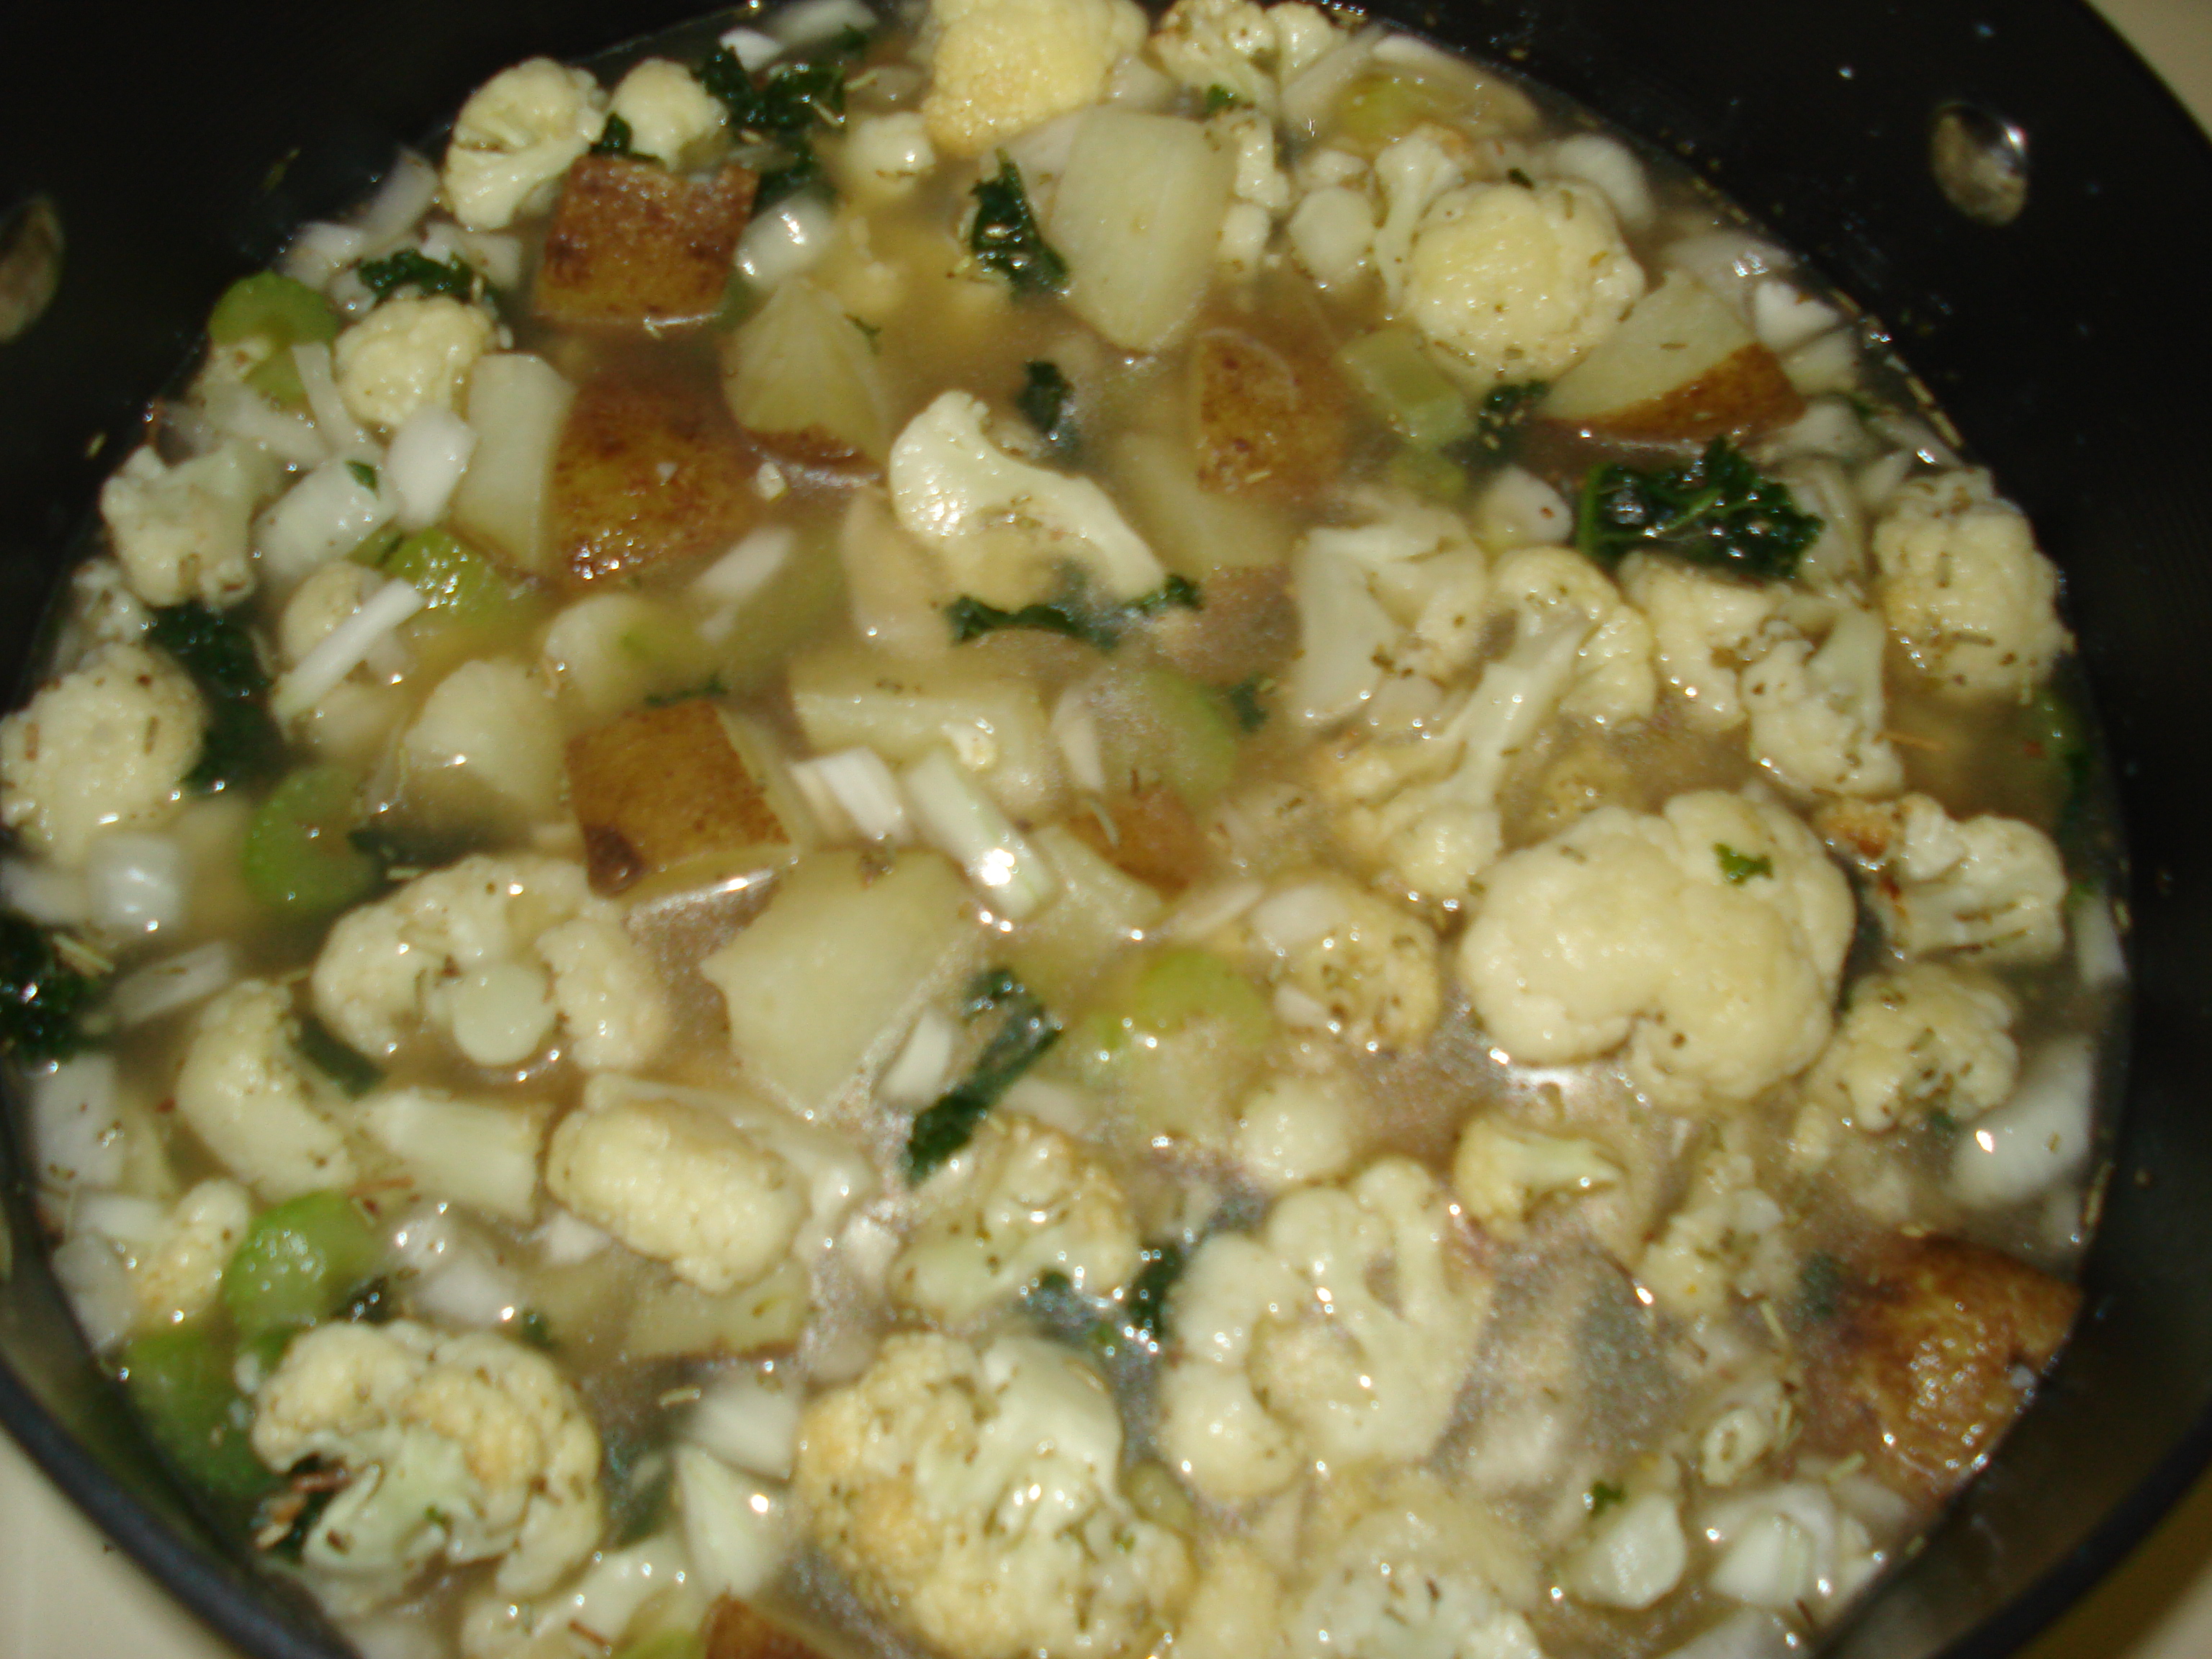
5. Using an immersion blender {or in batches in a blender/food processor}, blend the soup until it is smooth.

blending soup

6. Season with additional salt and pepper, to taste, and serve warm. {Ours tasted perfect paired with these low-fat garlic cheese biscuits!}

cauliflower soup

This soup was delicious, perfect for a snowy winter night. And I love how healthy it is! Such a creamy soup, without any cream!

Anyone else loving immersion blenders and blended soups?

—-

if you liked this recipe, you might also enjoy:
chicken & veggie stew in the crock-pot
savory pumpkin & kale stew
my favorite mashed potatoes
easy sausage, veggie & potato bake

goals & meal-plan for the week of 2/24

How is it the end of February already?? Gah, this month always flies by SO fast … you’d think I’d be prepared for it by now! Alas, I am not. Every year, I pretty much stand on the sidelines and watch February race by while I call feebly after it, “Hey, wait for me!”

Anyone else feel the same way?

Here’s how I did on my goals this past week:

  • revise up to page 90 of my thesis novel {not quite to page 90 but am feeling really happy about the new pages I wrote this week!}
  • blog about Week 7 Act of Kindness Challenge & complete it myself this week
  • publish blog post about 7: An Experimental Mutiny Against Excess {read my review here!}
  • finish grading papers for both classes
  • take old financial/health documents to the bank to be shredded
  • knit 25 rows of the scarf I’m working on
  • prepare for my presentation at The Louisville Conference on Saturday

I realized that last week I forgot to show you pictures of my newly purged and organized file box, cleaned out of all the old bank statements/health invoices/other expired documents which have now been shredded at the bank! WOO! Here is a belated picture, for no other reason than I was proud of myself for crossing this task off my list and wanted to share with you:

files collage

Here are my goals for this upcoming week:

  • revise up to page 100 of my thesis novel
  • blog about Week 8 Act of Kindness Challenge & complete it myself this week
  • finish reading Blackberry Winter for the PBF February Book Club
  • finish grading papers for both classes {yes, this is almost always one of my weekly goals because the papers just.keep.coming!} 🙂
  • go through & purge/organize giant box of office supplies in our closet
  • knit 25 rows of the baby blanket I’m working on

And here are a few recipes I am excited to try out:
crock-pot lentil sweet-potato soup
coconut-crusted chicken
asian peanut veggie dip
baked mango with brown sugar & cinnamon
whole wheat pumpkin scones with vanilla bean glaze

What are some of your goals and menu plans for the week?

goals & meal-plan for the week of 2/17

Hi everyone! How is your weekend going? Mine has been fantastic — filled with lots of wonderful Mr. Jude time! Yesterday we did lots of puzzles, had a jam session on the piano, and spent an afternoon at Chuck E. Cheese. And Jude was my little helper at the grocery store, helping me pick out ingredients for my white-chicken chili, which I made last night for Mike’s family. Here he is having fun in the kitchen:

cutie kitchen helper

And the weekend would not be complete without some quality cuddle time on the couch!

jude dallas cuddles

It breaks my heart to have to say goodbye to this little guy. He is such a sweetheart. I am already looking forward to our next long visit over spring break!

Here’s how I did on my goals from this past week. I feel a lot better about the progress I am making on my thesis novel now that I have scaled back my goals and given myself a little more room to breathe:

  • revise up to page 60 of my thesis novel
  • blog about Week 6 Act of Kindness Challenge & complete it myself this week
  • blog about 7: An Experimental Mutiny Against Excess {post is scheduled to be published this week!}
  • clean out and organize filing cabinet
  • knit 25 rows of the new scarf I’m working on
  • make 3 changes/updates as part of the #28DBC

Here are my goals for this upcoming week:

  • revise up to page 90 of my thesis novel
  • blog about Week 7 Act of Kindness Challenge & complete it myself this week
  • publish blog post about 7: An Experimental Mutiny Against Excess
  • finish grading papers for both classes
  • take old financial/health documents to the bank to be shredded
  • knit 25 rows of the scarf I’m working on
  • prepare for my presentation at The Louisville Conference on Saturday

And here’s some recipes I’m planning to make this week:
baked fish cakes
edamame hummus
cilantro-lime quinoa with chicken
chopped brussel sprouts with cranberries, pecans & feta cheese
chocolate turtle cookies

What are your goals + meal plans for this week?

MPM-Winter

This post is linked up with Menu-Plan Monday!

2-ingredient pulled pork in the crock pot

I have another recipe to share with you today as part of the crock-pot challenge issued by Julie at Peanut Butter Fingers! This is actually from a recipe I found on Julie’s site. I’m a big fan of bbq pulled pork sandwiches — but it seemed like a dish that took a lot of time and some sort of fancy meat cooker to pull off, so it’s always been something I’ve ordered in restaurants but never attempted to make on my own.

That is, until now! Julie’s recipe made it look so easy I had to try it. I am SO glad I did!

This is now one of my go-to crock-pot recipes! And perhaps my favorite part: it only needs TWO ingredients! {Plus whatever else you want to use to dress it up!}

pulled pork

2-ingredient pulled pork in the crock pot

– 1 pork tenderloin {I used one that was about 4 pounds}
– 1 can of low-sodium beef broth

1. Place the pork tenderloin in the crock pot and cover with the beef broth.

2. Cook on low for 6-8 hours or high for 4 hours, until pork is cooked through and juicy. Tear it apart with a knife and fork and transfer to a plate for serving.

And that’s it! Here’s what my pork looked like when I arrived home from school:

pork in crock pot

And it smelled DIVINE! Here’s the result when I turned off the crock pot and transferred the pork to a plate for serving:

pulled pork

Then all I did was plop some pork on a bun, add some Famous Dave’s BBQ Sauce, and I had a delicious homemade dinner to enjoy! The sandwiches paired nice with a light salad and fruit. I’m thinking next time I might add pineapple slices to the top of the pork to make Hawaiian BBQ Pulled Pork Sandwiches!

bbq pork sandwich

Another reason I love this recipe? There’s plenty of leftovers for lunch tomorrow! Score! 🙂

What are some of your favorite crock-pot recipes? Have any of you made pulled pork in the crock pot before?

Have a wonderful Wednesday!
-Dallas

——————————

If you liked this post, you might also enjoy:
crock-pot chicken with black beans & corn
easy honey-lime chicken enchiladas
cilantro-honey salmon
favorite mashed potatoes

***This post is featured on Menu-Plan Monday!

MPM-Winter

easy sausage, veggie & potato bake

Happy Thursday! I thought I would share a simple recipe with you today that my mom showed me back when I was home for Christmas. {Hard to believe that was a month ago!} It’s perfect for a cold winter night when you want to make something healthy and hearty — and an extra bonus is that it comes together really quick!

sausage potato veggie bake

easy sausage, veggie & potato bake

– 1 package of your choice of sausage {i like turkey sausage or chicken sausage}
– 1 medium onion
– 1 red bell pepper
– 1 green bell pepper
– 3 cloves garlic, minced {i used 3 tsp of pre-minced garlic}
– 2-3 lbs of small red potatoes {depending on your amount of potato love}
– 1 cup chicken broth {i like the low-sodium kind}
– salt & pepper to taste

1. Quarter the potatoes. Bring a pot of water to a boil and cook the potatoes for 10-15 minutes, until soft.

2. Brown the sausage in a skillet until cooked through.

sausage

3. While sausage and potatoes are cooking, roughly chop up the veggies. Combine in a big bowl with the garlic until well-tossed.

pepper and onion

4. Once potatoes are cooked through, drain the water.

potatoes

5. Once sausage is cooked through, transfer to a cutting board and slice into pieces.

6. In a glass baking dish, combine veggies, potatoes and sausage. Pour chicken broth over mixture. Add salt and pepper to taste.

7. Bake for 20 minutes in a 350 degree oven, until veggies are tender.

8. Serve plain or over rice! I like serving this dish with corn muffins.

What are your plans for this upcoming weekend? Mike and I are going to have a quiet night in tomorrow — I’m looking forward to cuddling up on the couch with a movie! {Looking to save money on date night? I compiled a list of some of my favorite strategies here.}

Till soon!
-Dallas

MPM-Winter

**This post is a part of Menu-Plan Monday!

cilantro-lime quinoa with chicken

Happy Wednesday, everyone! Hope your week is going great!

I’m excited to share this quick & healthy dinner recipe with you today: I adapted this recipe from LaaLoosh and made it a little heartier by adding chicken. {Her post lists it as a side dish; Mike and I ate it as a main dinner dish.}

cilantro-lime quinoa with chicken

  • 1 cup quinoa
  • 1 medium onion, diced
  • 1 yellow bell pepper, diced
  • 3 tsp minced garlic
  • 2 chicken breasts, diced
  • 2 cups fat free vegetable broth
  • a 4oz can green chiles
  • 2 tbsp lime juice {I used the juice of one lime}
  • 1/2 cup green onions, chopped
  • zest from 1 lime
  • 2/3 cup cilantro, finely chopped
  • salt and pepper to taste
  • optional: 1 jalapeno, seeded and finely chopped {I did not use a jalapeno because I am a wimp when it comes to spicy things, but I’m sure it would be tasty if you’re feeling daring!}

1. Spray a pot with non-fat cooking spray and set over medium high heat. Add the onion, bell pepper, chicken and garlic and sauté until tender and fragrant, about 7-8 minutes. {If mixture sticks to the pan, add in a bit of the broth to deglaze.}

2. Stir in chiles and cook for another 2 minutes.

3. Add in quinoa and remaining broth and bring to a boil.

4. Reduce heat to a gentle simmer, cover and cook until the quinoa is tender and most of the liquid has been absorbed {about 25 to 30 minutes.}

5. Add in remaining ingredients and fluff with a fork. Serve immediately.

This smelled SO good cooking! Mike and I were so hungry that I forgot to take a picture of our bowls before we began to eat. All I have for you is a picture of the meager leftovers in a Tupperware container, ready to go into the fridge for lunch the next day.

quinoa

You’ve just gotta trust me … it was delicious!!

This recipe is definitely a make-again for us! And with the mix of quinoa and chicken, it’s a healthy dish that will also keep you satisfied — perfect to get a healthy start on the new year.

What are some of your favorite healthy yet hearty recipes?

If you liked this post, you might also enjoy:
chicken & quinoa salad
honey-lime chicken enchiladas
crock-pot chicken w/black beans & corn

This post is linked up with Menu-Plan Monday!

MPM-Winter

chocolate-chip banana muffins

One of the first baking recipes I ever learned to make was my mom’s banana bread. To me, banana bread just tastes like home. And it’s a great recipe for someone like me who hates to waste food. I prefer to eat bananas when they are just ripening, still a little green at the tips. When they begin to get brown spots, I really don’t care for them. But thanks to Mom, I don’t have to worry about them going to waste — I just whip up a batch of banana bread…

…or banana muffins! In the past few years I’ve gotten really into making muffins instead of bread because I just find muffins so much more portable — easy to slip into a lunchbox or grab for breakfast on the way out the door. {That said, you could easily adapt this recipe for a loaf of bread if you’d prefer!}

I added chocolate chips to Mom’s recipe for a little extra treat to start the school year off right. 🙂 Hope you enjoy these as much as I do!

DSC00005

chocolate-chip banana muffins

  • 1/3 cup butter or margarine
  • 1/2 cup sugar
  • 2 eggs
  • 1 tsp vanilla
  • 1 & 3/4 cup flour {I used whole-wheat flour}
  • 1 tsp baking soda
  • 1 tsp baking powder
  • 1/2 tsp salt
  • 1 cup ripe mashed bananas {I used two bananas}
  • 1 cup chocolate chips

1. Preheat oven to 350 degrees. Line muffin tin with paper cups and set aside.

2. In a large bowl, cream together butter and sugar. Add the eggs and vanilla and beat well.

3. In a separate bowl, sift together dry ingredients.

4. Add a portion of the dry ingredients to the wet ingredients, mixing well. Then add a portion of the mashed bananas. Continue alternating dry ingredients and mashed bananas until the entire mixture is combined. {Batter will be slightly lumpy due to the bananas.}

DSC00052

5. Add chocolate chips.

6. Spoon batter into paper muffin cups, about 3/4 of the way full.

DSC00004

7. Bake for 22-25 minutes, until golden brown and a toothpick inserted in the center comes out clean.

DSC00006

Enjoy! These are great for breakfast, a mid-afternoon snack, and also make a great healthy dessert!

Hope your week is going great,
-Dallas

mom’s classic chocolate-chip cookies

My mom makes AMAZING chocolate-chip cookies! Back in college she’d send me big batches of chocolate-chip cookies and my dorm-mates would actually cheer. {I would share them of course!} Hmmm, thinking about it now, maybe I should thank Mom for helping me make friends! 🙂

This year, Mom gave me her recipe and I tried my hand at making a batch … they didn’t turn out quite as well as hers, but still pretty darn delicious. Crispy, buttery edges; gooey chocolatey middles. It’s hard to go wrong with a chocolate-chip cookie!

chocolate chip cookies

mom’s classic chocolate-chip cookies

– 2 and 1/4 cups flour
– 1 tsp baking soda
– 1 tsp baking powder
– 1 tsp salt
– 1 tsp cinnamon
– 1 cup butter, softened
– 3/4 cup sugar
– 3/4 cup packed brown sugar
– 1 tsp vanilla extract
– 2 large eggs
– 1 package semi-sweet chocolate chips

1. Preheat oven to 375 degrees and line a baking sheet with parchment paper.

2. Cream butter through sugar.

butter & sugar

3. Add eggs and vanilla and beat well.

4. Sift together flour, baking soda, baking powder, and salt.

flour mixture

5. A little at a time, add flour mixture to wet ingredients, stirring well to combine thoroughly.

cookie batter

6. Add chocolate chips and cinnamon, if desired.

chocolate chip batter

7. Scoop by tablespoons onto a baking sheet.

cookies prebake

8. Bake for 12-15 minutes, until cookies are golden-brown and firm to the touch.

cookies baked

9. Allow to cool for 5 minutes, then remove from baking sheet.

I like these cookies best when they’re still warm — and of course with a big tall glass of milk!

choc chip cookies

Hope you are enjoying these last couple days before Christmas!

-Dallas

———

If you enjoyed this post, you might also like:

butterscotch pudding cookies
aunt elaine’s peanut butter blossoms
apple, brown sugar & cinnamon cookies
pumpkin oatmeal cookies

This post is linked up to Menu-Plan Monday!

MPM-Winter

homemade chocolate-covered popcorn

I read in a magazine recently that popcorn contains more antioxidants than some fruits and vegetables! Adding to that, one cup of popcorn {the healthy, air-popped variety, that is} has less than 50 calories! Hello, my new favorite snack. I also love popcorn because it is so versatile – you can add seasonings to make it salty, cheesy, spicy, or sweet.

Or … kick it up a step further and add some chocolate to the mix! {I know, I know, this definitely crashes-and-burns the whole “under 50 calories” thing … but the way I see it, chocolate-covered popcorn is pretty healthy on the dessert scale!} I made mine with dark chocolate to take advantage of even more antioxidant power.

chocolate popcorn

Before making this dish, I had never even attempted to melt chocolate before. I do not have a double-broiler so I just used my microwave. I was worried it would be difficult or time-consuming, but it was incredibly easy. I am already looking forward to livening up my next movie night in with Mike by whipping up another batch of this addicting treat!

homemade chocolate-covered popcorn

– 1 package popcorn of choice {I like to use a healthy, whole-grain version with no added butter or salt}
– 1/2 cup chocolate chips
– 2 tsp butter
– salt, cinnamon, or other spices to taste

1. Pop popcorn according to package directions. Dump into a big bowl and pick out any unpopped kernels. Sprinkle with salt and cinnamon.

2. Melt chocolate and butter over a double-burner or in a microwave-safe bowl. {Melting times vary based on the power of your microwave, but I’d recommend using a series of shorter time increments and stirring more often so as not to burn the chocolate by cooking too long!}

3. Pour melted chocolate onto the popcorn.

popcorn

4. Using a spoon {or your hands!} mix popcorn and chocolate together, breaking apart any large clumps of chocolate, until the popcorn is evenly coated.

chocolate covered popcorn

5. Allow to cool, then store in an airtight container.

I gifted a batch of this popcorn to a coworker using a homemade “upcycled” gift container. I’ll share more about making homemade gift containers in my post tomorrow, so stay tuned! 🙂

upcycled gift containers

Have a wonderful day!

Till soon,
Dallas

holiday white chocolate pretzels

How is your week going? Mine is flying by. It’s the last week of school before I head home to California for the holidays, and I am a mix of productive “aaack-so-much-to-get-done!” and lazy “it’s-December-and-I-just-want-to-bake-cookies-and-watch-Love-Actually.” Tonight I channeled both of these inclinations and baked festive white chocolate pretzel goodies to give to some of my friends and colleagues as Christmas gifts.

holiday masterpiece

I came across this recipe on one of my favorite blogs, Peanut Butter Fingers, and I tweaked it slightly because I couldn’t find the white chocolate wafer candies that Julie’s recipe called for. I just used plain chocolate and they turned out great!

DSC00015

Here’s all that you need:

  • pretzels
  • green and red M&Ms
  • small chocolate pieces {I broke apart these Andes peppermint white chocolate pieces}

DSC00019

Directions:

1. Preheat oven to 325 degrees. If desired, line a cookie sheet with parchment paper.

2. Spread a layer of pretzels over the cookie sheet.

3. Break chocolate apart into small pieces and place one piece in the center of each pretzel.

DSC00002

4. Bake for 3-4 minutes, until chocolate begins to melt.

5. Gently press a red or green M&M, writing-side down, into the chocolate.

DSC00003

6. Transfer pretzels to a plate and allow to cool.

7. When chocolate has hardened, store the pretzel treats in a tin or air-tight container.

DSC00018

I packed mine up in these cute tins I found at Target in the dollar section:

DSC00014

This is such an easy and inexpensive holiday baking recipe. These white chocolate pretzels are a special, home-made treat that your friends and loved ones will gobble up! {Or make a big batch for yourself — I won’t tell!} 🙂

Have a wonderful day,
-Dallas

——————-

-Time spent: 20 mins
-Cost: $6.00

*This post is linked up at I’m an Organizing Junkie as part of Menu-Plan Monday!

MPM-Winter

Here are the other posts in my “Make Your Holiday Season a Masterpiece” series:
homemade festive decorative chain
little oases of rest in a hectic, busy season